Raised Bed Gardening: How to Get Started and Succeed

Raised bed gardening is a practical way to grow reliable crops at home in the UK. It gives you control over soil, drainage and layout, which helps when your existing garden soil is heavy or poor.
This short guide will help you plan and build sturdy beds, choose a suitable base and soil mix, water efficiently and plant for steady yields. You will learn to make sensible choices on place, size, height and materials so you do not waste money or create hard-to-manage areas.
Think of this as a flexible way to grow food whether your ground is clay, compacted or awkwardly shaped. Start with one or two beds, learn over years and scale up in time as your confidence grows.
This guide focuses on practical success: reachable widths, sensible spacing, good drainage and planting methods suited to beds rather than traditional rows. Materials covered are UK-appropriate, from timber and masonry to recycled plastic sleepers, with safety notes on treated wood. The advice is present-day and based on real-world experience so you can act straight away.
Inhaltsverzeichnis
Key Takeaways
- Raised beds let you control soil and drainage for better crops.
- The guide shows planning, building, filling and watering steps.
- Start small—one or two beds—and expand over years.
- Choose sensible sizes and UK-appropriate materials.
- Focus on spacing, steady moisture and planting methods for beds.
Why you’ll love raised beds for growing food at home
You can sidestep poor ground soil by starting with a contained planting area filled with a known mix. That control boosts germination, helps roots establish and gives you consistent results for your favourite crops.
Better soil control
Better soil control when your ground soil isn’t ideal
Bringing in clean, fertile soil lets you avoid heavy clay or thin topsoil. Seedlings get a predictable start and mature plants show steadier growth.
Less bending, fewer weeds, and easier harvests
A sensible height reduces stooping, so sowing, weeding and harvesting feel easier on your back. Taller sides also cut the number of weeds that push up from the ground beneath.
Improved drainage and faster warming in spring
Raised areas warm earlier and shed excess water faster than heavy ground. The trade-off is quicker drying, so check moisture and water regularly to keep plants healthy.
| Benefit | Practical outcome | Tip |
|---|---|---|
| Soil control | Consistent germination and growth | Use a tested soil mix |
| Comfort/height | Easier daily care and harvests | Choose a work height that suits you |
| Weed reduction | Cleaner beds, less time weeding | Line base or add compost barrier |
| Drainage & warmth | Earlier planting and less waterlogging | Plan regular moisture checks |
Smart choices on size, spacing and materials will make these advantages last and avoid creating new problems. The next section shows how to plan your layout and scale up over time.
Planning your raised bed garden over time
Treat this as a multi-year project. Start with a couple of small, well-placed beds and let each season teach you what works in your garden.
Start small and scale with confidence. Build raised beds in priority spots first—sunny areas near water—so your early effort pays back quickly. Over the years you can add more where success and appetite suggest.
Budget realistically for time and costs. Factor in timber, brick or recycled options, fixings, soil and compost volumes, plus basic tools. Filling a single bed needs more soil than many people expect.

Use a simple decision framework: What will you grow? How often will you be out there? How will you water? Where will compost be stored? This keeps expansion practical and prevents overbuying materials or choosing a height you later regret.
- Phase builds: priority locations now, extras in later years.
- Design for the time you have—fewer, irrigated beds beat a sprawling layout.
- Expect ongoing inputs: top up soil with compost and refresh the mix on hard surfaces.
Choosing the best place for your raised bed
Find a sunny, sheltered corner near your tap so routine care feels easy.

Light matters. Walk your garden across a clear day and note hours of direct sun. Avoid heavy shade from fences, sheds or neighbouring buildings so your plants grow stocky and productive.
Wind and shelter. Exposed sites dry out quickly and can snap taller crops. Position beds with a leeward side to a fence or plant a low windbreak to reduce stress and water loss.
Practical access and water
Good access to water is crucial. If the tap is far, you will skip watering in warm weather and soil will dry fast. Keep beds within easy reach of the house for quick checks, pest control and harvesting.
- Plan paths wide enough for wheelbarrows and tools.
- Avoid crossing hoses regularly — route irrigation cleanly.
- Think ahead if you plan drip lines or a modular grid for even moisture.
| Factor | Why it matters | Simple action |
|---|---|---|
| Sunlight | Drives growth and yields | Map sun hours, choose the sunniest place |
| Wind | Increases drying and damage | Use fences or hedging as shelter |
| Water access | Encourages regular watering | Site beds near an outdoor tap or lay simple pipework |
| Access | Makes maintenance faster | Keep beds close to the house with clear paths |
Deciding on raised bed height for comfort and crop success
Choose a practical height so daily tasks feel easier and your crops thrive. There is no single correct height; common ranges run from about 8 inches to 30 inches, and many gardeners find roughly 15 inches comfortable.

Working height and mobility
If you struggle with bending, a taller structure reduces strain and makes weeding and harvesting simpler. Taller heights let you work while standing or leaning, which helps joints and keeps you in the garden longer.
Weeds, small animals and access
Taller walls can cut the number of weeds pushing up from below and make it harder for rabbits and other small animals to reach crops. That said, fencing is still the best defence where pest pressure is high.
Filling costs, layers and settling
The taller the bed, the more soil you must buy. Be realistic about the effort and cost so you can fill properly.
One cost-saving way is to add bulk at the bottom — sticks and shredded leaves are options — but they will settle over time and need topping up.
Matching crop height and roots
Tall beds can be awkward for very tall crops when tying and harvesting. Shorter beds let roots reach the native ground, which can improve resilience and nutrient uptake. Make sure you allow for settling and future top-ups when you choose a level.
“Choose a height that suits your body and the plants you want to grow.”
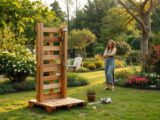
Getting the size right: bed width, length, and layout
Deciding practical dimensions now saves effort and expense later. Think about how you will reach the centre, move compost and work the soil. Good sizing protects soil structure and keeps daily tasks straightforward.

Keep width reachable without stepping on the soil
Reachability matters. If you can access only one side, aim for no more than about 2.5 feet so you can sow, weed and harvest without compacting the soil.
If you can work from both sides, 4 feet is a sensible maximum. Test your arm span before you build.
Why length is flexible and how to avoid awkward access
Length gives you more growing area. Longer beds cost more in materials and soil, but they are fine if paths and access stay practical.
Avoid very long runs that force long detours during a single job. Align lengths with paths and water so you do not waste time.
Designing for crop rotation and consistent spacing
Keep bed sizes consistent across the garden. Matching dimensions makes crop rotation simple and helps you move plant families each year without redesigning the layout.
- One large bed or several smaller ones? Smaller, regular units make access, covers and pest control easier.
- Place beds near paths, the tap and compost to cut daily tramping and carry distance.
- Remember taller or longer builds increase material and soil costs fast.
“Protect your soil by choosing widths you can reach — it saves work and improves yields.”
| Factor | Practical rule | Why it matters |
|---|---|---|
| Width | 2.5 ft (one side), up to 4 ft (both sides) | Prevents compaction; easy access to centre |
| Length | Flexible — match to path layout | Maximises space without creating long detours |
| Uniform size | Use same dimensions across beds | Simplifies crop rotation and planning |
Leaving the right space between beds
Give thought to the gaps you leave between planting areas — they shape how easily you work all season. Good spacing helps with daily chores, keeps paths tidy and saves you time in the long run.

Allowing for wheelbarrows, compost and easy movement
Plan pathways wide enough for a wheelbarrow and a person to pass with compost or tools. This ensures you can deliver compost without spilling and reach beds comfortably.
Make sure routes link the compost bay, tap and shed so moving materials is a simple, direct way of working.
Avoiding wasted space that becomes extra mowing or mulching
Too little space makes tasks awkward; too much becomes an area you must mow or mulch. Choose a sensible middle ground that supports access and keeps maintenance time low.
- Map your movement: test routes from shed, tap and compost before you fix positions.
- Surface choices matter: mulch saves time but needs topping; gravel gives drainage; paving is low‑maintenance.
- Allow room for netting, cloches and harvesting so plants aren’t crushed.
- Do a wheelbarrow test with boards to confirm access feels easy to assemble and use.
| Surface | Pros | Cons |
|---|---|---|
| Mulch | Cheap, suppresses weeds | Needs topping; can decompose into mud in wet time |
| Gravel | Good drainage; low maintenance | Can shift; needs edging to keep tidy |
| Paving | Stable access year‑round | Higher cost; less natural for water |
| Grass (mown) | Low initial cost | Creates mowing time and wear paths |
“Before you fix positions, place markers and push a filled wheelbarrow along each route — it quickly shows what works.”
Materials to build raised beds: what works best in the UK
Choosing materials shapes cost, appearance and how much time you spend on upkeep. Use the right option for your garden style, budget and how long you want things to last.

Wood and timber options for most gardens
Timber is the most popular material. It is easy to source, cut and assemble. You can build straight beds quickly with basic tools.
Pros: cheap to buy, quick to work with. Cons: timber weathers and will need repair or replacement after several years depending on treatment.
Stone and brick for durability and curved designs
Stone and brick last for decades and suit curves or formal garden design. They usually need footings and more skilled labour, so expect higher upfront cost.
Paving slabs for a deep, budget-friendly bed
Paving slabs on edge give a deep, inexpensive option. For stability bury at least 15 cm and leave about 45 cm above soil level. They may shift and need resetting over time.
Recycled plastic sleepers for low maintenance
Plastic sleepers are rot-proof and require little maintenance. They can look like timber, but cost more and have fixed sizes to plan around.
“Match material to your garden and the time you want to spend on maintenance.”
Compare materials by budget, durability (years), appearance and build effort so you can choose suitable options. Your choice also affects drainage design and how you will build on hard surfaces.
Using treated timber safely and sensibly
Understanding current wood treatments helps you balance cost, longevity and food safety. Since 2003 most preservative systems moved away from arsenic toward copper-based formulas. That change matters if you plan to grow edibles near timber structures.

What changed after 2003 and why many gardeners still use it
Post‑2003 treated wood uses copper compounds that protect against rot and insects. These are widely accepted for outdoor use and are much safer than older arsenic treatments.
Many gardeners choose treated timber because it is affordable and lets you build more beds for a lower upfront cost while still protecting boards for years.
When rot-resistant timber may be worth the extra cost
If you prefer lower maintenance and a longer lifespan, rot‑resistant species such as oak, larch or thermally modified wood can be worth the extra outlay. They reduce repair cycles and avoid chemical coatings altogether.
- Make sure you buy modern treated wood from reputable suppliers and follow manufacturer guidance.
- Seal cut ends, avoid constant water contact and design for airflow so boards dry between wet spells.
- Plan maintenance: untreated wood will need repair or replacement sooner; factor that into cost decisions.
“Your choice is a balance of budget, lifespan and comfort — you can grow successfully either way.”
Building on hard surfaces like patios and driveways
In many UK gardens a paved or concrete surface is the only practical place for a growing area. A surface build gives tidy results close to the house and saves you digging. But you must design for drainage to stop the bed acting like a sealed container.

Design tweaks to protect drainage and prevent waterlogging
The main risk is water pooling at the bottom and soaking the soil. Make sure excess water can leave the base and run to a safe drain or soakaway.
Where a hard-surface build makes sense: small gardens, paved courtyards, or when you want a tidy kitchen area near the house. Plan routes so runoff does not make paths slippery or add damp to adjacent walls.
Adding drainage holes or gaps depending on material
For timber sides add plenty of side holes near the bottom so water can escape. Space these evenly and low down to give uniform outflow.
For stone or brick walls leave built-in gaps in the first two courses about 45 cm apart. On the inside, line each gap with fine wire mesh and heap gravel against it to stop soil washing through.
- Position outlets so water runs away from the house and neighbours.
- Use mesh to keep drainage points clear and prevent clogging.
- Allow a gravel filter zone at the inside base to protect openings.
“Treat a hard-surface install as a container that needs planned outflow — get the drainage right and the rest is straightforward.”
Building masonry beds: footings, stability, and long-term structure

Masonry structures need careful foundation work to stay square and stable in UK weather.
Why masonry needs more structural thinking: stone and brick weigh more than timber and must resist the sideways pressure of wet soil. Frost heave and long-term settling can cause cracking or leaning if walls are only dry‑stacked.
When mortar and concrete footings are needed
Use mortar bonding and concrete footings once walls exceed about 20 cm (8 in). This rule cuts the risk of movement and keeps walls aligned over time.
Practical footing dimensions: lay concrete footings roughly 15 cm (6 in) deep and 30 cm (1 ft) wide. Place those footings on a hardcore layer about 15 cm (6 in) deep to stop settling. These measures make it easier to discuss plans with a builder or tackle a DIY job confidently.
Separating lime in mortar from sensitive roots
If you plan to grow ericaceous or other acid-loving plants, line the inside of the masonry with recycled plastic. This prevents lime in mortar from leaching into the soil and upsetting the pH that delicate roots prefer.
Other practical notes: even with strong walls you must plan drainage. Add weep holes or gravel-filled outlets on hard surfaces and prepare a free-draining base on ground installs. Masonry suits curved shapes and a formal look and rewards you with minimal upkeep for many years.
| Issue | Recommendation | Why it matters |
|---|---|---|
| Wall height & stability | Mortar-bond walls above 20 cm | Reduces cracking and leaning |
| Footing size | Concrete 15 cm deep × 30 cm wide on 15 cm hardcore | Prevents settlement and frost movement |
| Plant health | Line inside with recycled plastic for acid-loving plants | Stops lime reaching sensitive roots |
| Drainage | Weep holes, gravel base or mesh-protected outlets | Prevents waterlogging and soil loss through openings |
“Masonry gives a long-lasting, elegant result — get the base right and the walls will do the rest.”
Preparing the base and bottom for drainage and healthy roots
Prepare the base carefully so excess water can escape and roots stay healthy.

What makes a good base depends on where you place your structure. If the bed sits on soil, allow contact with the ground so water drains and roots can explore. On a paved surface you must create clear exit points for run-off.
Why you must avoid trapping water at the bottom
Trapped water in UK conditions leads to root stress and poor growth. After heavy rain a blocked bottom can turn the area into a bog and encourage rot and nutrient loss.
How to prepare the bottom and protect drainage points
Remove turf and level the site so the base sits flat. Check for hollows; a sloping or uneven bottom causes pooling in one corner. On hard surfaces cut or leave gaps low in the sides to let water escape.
Cover each gap on the inside with fine wire mesh and heap a layer of gravel against it. The mesh acts as a filter and keeps soil from washing out while allowing steady drainage.
Mesh also helps deter burrowing pests while still permitting root movement where you want it.
“Even perfect base prep won’t help if your soil mix is too fine or lacks organic structure.”
| Situation | Key action | Why it matters |
|---|---|---|
| On soil / ground | Leave base contact; level and remove turf | Encourages natural drainage and root exploration |
| On paving / surface | Create low outlets; mesh + gravel inside | Prevents pooling and keeps soil in place |
| Bottom prep | Ensure flat sit; check for pooling | Avoids localised waterlogging and root stress |
| Drainage protection | Fine mesh filter with gravel | Keeps pores clear and deters pests |
Next: focus on filling the beds with a soil mix that drains yet holds nutrients. Even the best base needs a structured mix to perform well.
Filling your raised beds with the right soil mixture
A sensible soil mix gives seedlings a calm place to grow and roots room to explore.
What good soil looks like: fertile, crumbly and able to hold moisture without going waterlogged. It should be easy to fork, ready for sowing and transplanting, and show visible organic particles when you look closely.

A practical blend for most beds
Use a straightforward mixture of topsoil and organic matter. A common baseline is roughly seven parts screened topsoil to three parts well-rotted compost or leaf mould. This supports steady nutrition and structure for roots.
Soil mix for beds on a hard surface
On paving or concrete, treat the space like a very large container. Use three parts organic matter to seven parts topsoil and expect more frequent refreshes to keep good drainage.
Cost-saving layers and settling
You can add cost-saving layers such as sticks or shredded leaves at the bottom to reduce initial soil volume. These options break down over time and cause significant settling.
“Fill to the top and plan to top up once or twice a year with compost to keep soil level and fertility.”
| Need | Practical action | Why it matters |
|---|---|---|
| Soil mix | 7 parts topsoil : 3 parts organic matter | Balance of structure, fertility and drainage |
| Hard surface | Use 3:7 organic:topsoil; refresh regularly | Acts like a container; prevents waterlogging |
| Cost-saving layers | Sticks, shredded leaves at the bottom | Reduces initial volume but settles over time |
| Maintenance | Top up with quality compost 1–2 times a year | Maintains soil level and nutrient supply |
Buying soil smart: source screened topsoil and tested compost. Avoid loads that may hide rubble or weeds, and calculate volumes before ordering so you do not run out at filling time.
Watering raised beds: keeping soil moisture steady
Keeping moisture steady in your planting areas is one of the simplest ways to protect yields. Raised beds drain well, which helps root health but means the soil can dry faster than ground plots. Check regularly in warm or windy spells.

Why these structures dry faster
Improved drainage moves excess water away quickly. That stops waterlogging but shortens how long moisture stays near roots, so you must watch more closely.
How to check moisture below the surface
Push a clean finger about a finger’s depth into the soil surface. If it feels dry at that depth, give a sensible amount of water rather than guessing from the surface look.
Mulching to conserve moisture
Apply a 2–5cm layer of organic mulch to the surface. Mulch reduces evaporation, buffers temperature swings and cuts how often you need to water.
- Look for midday wilting, dull leaves or slowed growth — early signs your plants lack moisture.
- After windy days or warm spells, check more often and water when the subsurface is dry.
Steady moisture supports young plants and shallow-rooted crops best. A simple habit of checking and mulching saves you time and gives more reliable harvests.
Setting up irrigation before you plant
Plan your irrigation layout before planting. Fitting lines now saves you time and stops you damaging roots or crowding seedlings later. It is much easier to work with empty soil than to try and snake tubing among established plants.

Drip systems and grid watering for even coverage
Drip irrigation delivers targeted water to the root zone, reduces evaporation and keeps foliage drier — often cutting disease pressure. A grid-style approach, such as the Garden in Minutes Garden Grid, helps prevent the common dry corner by spreading flow across the whole surface.
Plan tubing routes and practical access
Decide where the main line enters, where connectors sit and which side you will service for flushing. Lay lines so they are easy to lift for seasonal clean-outs and allow clear access to paths and tools.
- Match the layout to your bed size and plant spacing so every crop receives steady moisture.
- Use simple clips and removable tees for an easy assemble system that you can adjust as plants mature.
- Basic maintenance: flush lines occasionally, check for kinks or clogs and alter run times as shade increases.
“Install irrigation now and you’ll avoid fiddly, plant‑disturbing repairs later.”
Planting for high yields in raised beds
Shift from walk‑between rows to reach‑from‑the‑edge planting and reclaim otherwise wasted soil. This change lets you use the full surface efficiently while keeping plants easy to tend.

Rethinking row spacing
Row spacing on seed packets assumes you will walk between rows. In your beds you do not need that gap, so you can reduce row spacing and add more plants without compacting soil.
Respect plant‑to‑plant distances for airflow and roots. Closer rows are fine, but crowding raises disease risk and reduces yields.
Choosing crops to suit height and reach
Very tall structures can make climbing crops awkward to pick. Put compact, low crops where you have limited reach.
Place tall supports where they won’t shade other plants. That preserves light and makes maintenance simpler.
Where to place herbs
Keep perennial herbs like oregano, mint, thyme and rosemary out of annual planting areas. They spread and can dominate.
Use pots or a separate herb plot for perennials so your main beds stay productive for vegetables and seasonal crops.
Practical bed zoning and succession
Edges are ideal for quick‑pick salads and herbs; centres suit slower, root or brassica crops. Rotate and succession‑plant through spring and autumn to extend harvests.
| Zone | Best for | Spacing note | Tip |
|---|---|---|---|
| Edge | Leafy salad & quick herbs | Tighter rows; 10–20 cm between plants | Harvest frequently to encourage regrowth |
| Centre | Roots and brassicas | Allow root room; follow packet spacing | Use supports at ends to avoid shading |
| Back/High supports | Tall climbers (peas, beans) | Place supports to one side | Prevent shade over low crops |
“Match planting density to your width, irrigation and soil level — those choices decide how intensively you can grow.”
Maintaining raised beds year after year
A simple yearly rhythm of checks and top-ups saves work and protects yields. Keep inspections brief but regular so small issues do not become large jobs.

Topping up compost to maintain soil level
After a season or two your mix will settle. Top up with compost once or twice a year to restore the soil level and keep the surface usable.
Look for a visible drop below the frame or exposed roots. A quick top-up prevents shading of seedlings and keeps the usable depth consistent.
Managing fungi and wood rot as beds age
Untreated timber will soften over time as saprotrophic fungi break it down. That decay can mean repairs, but it also creates habitat and helps hold moisture.
If honey fungus is present in your garden, avoid wood sides and choose masonry or recycled plastic instead to reduce risk.
When to repair, refresh or replace soil
If drainage worsens, compaction rises, or yields fall, amend heavily or replace part of the mix. Beds on hard surfaces need extra attention and behave like large pots.
- Set an annual check: frame height, soil level and mulch condition.
- Top up compost and re-mulch to protect fertility and structure.
- Repair soft timber early or plan a non-wood replacement if rot recurs.
“Keep a simple log of what you sowed, pests you saw and how you watered — it makes each season quicker and more productive.”
Conclusion
Meta: concise conclusion for readers planning raised bed gardening, with key actions for place, size, soil, drainage and watering.
Finish your project by focusing on a few small, practical steps that pay off every season. Choose a sunny, accessible place, pick a reachable width and a comfortable height, and leave clear paths to work from.
Get soil and drainage right — that decision matters most in UK weather. Use a free‑draining mix, protect outlets and allow for settling so your plants thrive through wet and dry spells.
Plan your irrigation before you plant so you keep steady moisture without constant fuss. Plant sensibly with tight edge rows for salads and separate perennials so nothing overruns.
Maintain simply: top up compost, check timber or masonry, and refresh soil when yields fall. One well-built plot will teach you fast and make future projects easier.
FAQ
How deep should I make my raised bed for most vegetables?
Aim for around 30–45 cm of good soil where most vegetables will develop healthy roots. Taller crops like carrots and parsnips need closer to 45 cm, while salads and herbs do well in the shallower end. If you build above poor ground and want roots to reach native soil, design the base accordingly.
What materials work best for building beds in a UK garden?
Timber is popular because it’s easy to work with and looks natural. Use rot-resistant species or sustainably treated timber. Recycled plastic sleepers give low maintenance, while stone or brick suits permanence and curved designs. Paving slabs can create deep, budget-friendly structures; choose materials to match your style and budget.
Can I place a bed on a patio or driveway?
Yes, but you must protect drainage. Add a layer of well-draining material such as gravel and fit mesh to prevent soil loss. Provide drainage gaps or soakaway access so water doesn’t pool under the structure and damage the surface.
How far apart should I leave paths between beds?
Leave enough room for a wheelbarrow and easy access—usually 60–90 cm for simple manoeuvring. Narrower paths can work if you only need pedestrian access, but avoid overly tight gaps that make maintenance awkward.
What soil mix should I use when filling a bed on turf or hardstanding?
Use a blend of quality topsoil and plenty of organic matter such as compost or well-rotted manure. For beds on hardstanding, add a drainage layer and choose a lighter mix to avoid compaction. Fill to the top because settling will occur over the first season.
How do I water beds effectively without wasting water?
Mulch the surface to reduce evaporation and check below the surface with a moisture probe or your finger. Consider installing drip irrigation or a grid of tubing to deliver even moisture and cut watering time.
Is treated timber safe to use for growing food?
Modern, approved treatments are safe when used correctly. Since changes in 2003, many treatments differ from older types. If you’re concerned, choose certified rot-resistant timber or recycled plastic alternatives to avoid any doubt.
How wide should a bed be so you can reach the centre without stepping in it?
Keep width to around 90–120 cm so you can reach the middle from either side. This helps avoid compaction and keeps the soil friable for roots and drainage.
Will beds dry out faster than in-ground planting?
Yes. Raised soil warms and drains quicker, so it loses moisture faster, especially in windy or hot weather. Regular mulching and close monitoring will help keep moisture steady.
How do I protect timber beds from rot and prolong their life?
Use rot-resistant species or quality preservative, keep external soil contact minimal with a liner if desired, and ensure good drainage. Top up compost annually and repair any damaged boards promptly to prevent accelerated decay.
Can I mix annual and perennial crops in the same bed?
You can, but plan locations carefully. Put perennials like herbs at the edges or in a dedicated area so they don’t dominate. Rotate annual beds each season to reduce pest and disease build-up.
How should I plan my beds over the years if I want to expand?
Start with a couple of beds to learn what works in your space and soil. Budget time and materials realistically, then scale gradually. Design consistent spacing so adding more beds later is straightforward.
Do I need foundations for masonry beds?
For higher walls, concrete footings or proper foundations improve stability and longevity. Low masonry edges can sit on compacted base material, but check local frost and ground conditions before building.
What’s the best way to encourage drainage at the base of a bed?
Avoid trapping water by adding coarse gravel or grit below the soil and fitting a layer of mesh to keep soil from blocking drainage points. Ensure side gaps or weep holes if your design risks holding water.
How often should I top up soil or compost in my beds?
Top up with compost or organic matter once or twice a year to maintain soil level and fertility. Organic layers break down over time, so regular replenishment keeps structure and yields consistent.